Labels

Showing posts with label recipes. Show all posts

Wednesday, May 2, 2012

RECIPE: Mexican Pulled Pork in the Slow Cooker

I think it's pretty well-documented that I'm addicted to pulled pork. So, without further ado, here's another way to make pulled pork! This time it's Mexican -- just in time for Cinco de Mayo if, like me, you're probably going to spend Cinco de Mayo eating nachos on the couch while watching Tosh reruns.

By the way, this recipe was a uniting force after this weekend's sweet potato war. Hubby and I both agreed that this recipe was a winner: "One of your best of all time," he declared.


You'll need:

  • 1 lb. boneless pork loin
  • 1/8 cup lime juice
  • 1 Tbsp minced garlic
  • 1 tsp Goya Salsita (or any green chile sauce)
  • 1 tsp Mrs. Dash's fiesta lime seasoning*
  • 1 tsp Papa Joe's salt
  • 1 tsp ground cilantro
  • 15 oz. can of diced tomatoes


Throw it all in the slow cooker. Cook on LOW for 8 hours. Shred it up and enjoy! I served it with a mix of corn, black beans, and fresh avocado with a few shakes of chili powder and Papa Joe's mixed in. Feliz Cinco! :)

* SUBSTITUTE: a few heavy shakes each of chili pepper, paprika, cumin and cayenne
** SUBSTITUTE: a few heavy shakes each of sea salt, ground black pepper, and garlic powder

Monday, April 30, 2012

RECIPE: Sweet Potato with Ham, Black Beans, Pineapple, and Swiss Chard Cheese Sauce (Jeez, is that title long enough?!)

"A house divided against itself cannot stand." -- Abe Lincoln 

Maybe Abe was talking about Swiss chard? Because the leafy green turned out to be extremely divisive at the dinner table last night. By which I mean I loved it, and hubby hated it.

It started with a LivingSocial deal for Suburban Organics. Basically, Suburban Organics will ship fresh organic fruits and veggies to your door. I have trouble resisting group buys to begin with, and I love getting mail, and I love eating, and I love when things are marketed as organic or local or free trade or any other feel-good words. So hellz yeah I was getting this deal.

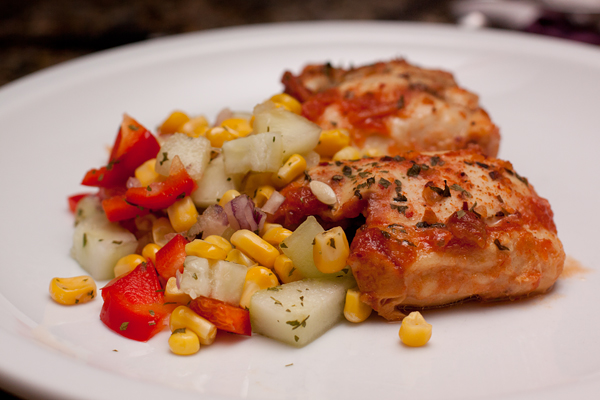
My box arrived a few days ago, and it contained some old faves (avocado! bananas! a medium-sized grapefruit!) but it also contained Swiss chard, which I couldn't have picked out of a veggie lineup. I posted a plea for recipes on my Facebook page. Suburban Organics was cool enough to link me to a few recipes on their site, but their recipes were a bit too...well, straight-up chard. As a chard virgin, I felt more comfortable mixing the chard with a bunch of other ingredients.

Enter Brianne at Cupcakes and Kale Chips, a.k.a. my aforementioned former foodie roommate. She sent me a very complicated recipe for Mexican sweet potatoes. I dumbed it down big-time and added ham (I needed the bone for split pea soup this week). And it was nothing short of amazeballs.


Except hubby heartily disagrees with me. His exact quote was, "Eww, what's that smell?" followed by several affirmations that it tasted as bad as it smelled, and finally, the helpful suggestion, "Don't ever cook chard again."

Me? I LOVED IT. So tasty. There were, like 17 unique and delicious flavors going on in my mouth, and it was still delicious. Imagine throwing a party and inviting your work friends, your college friends, your gardening-club friends, and your Civil War reenactment friends and everyone miraculously gets along.

Anyway. You have to be your own judge, but I thought it was awesome. (P.S. I was also directed to this tasty-looking recipe at Smitten Kitchen, but went with the Mexican recipe because I had already eaten half a brick of havarti and figured an au gratin might not be the best idea for dinner. But I'm putting it in the mental database -- clearly, for a night hubby's not home!)

You'll need:

  • sweet potatoes (I made three)
  • Swiss chard (I used four big leaves or stalks or whatever they're called)
  • olive oil
  • Papa Joe's salt
  • 1 Tbsp minced garlic
  • 1/2 cup milk
  • 1 cup shredded Monterey Jack
  • 1 red pepper, chopped
  • 15-oz. can of black beans, drained and rinsed
  • 2 Tbsp lime juice
  • 1 Tbsp chili powder
  • 1 Tbsp cumin
  • 1 cup canned pineapple chunks, drained
  • 1 tsp ground cilantro
  • 1 cup diced ham


STEP 1: Stab the sweet potatoes with a fork a few times, and cook them in the microwave on HIGH for about 10 minutes.

STEP 2: Rub some olive oil on a pan. Chop up the Swiss chard (I found a helpful tutorial here) and heat it in a pan with the garlic and a few shakes of Papa Joe's salt (or a mix of sea salt and black pepper).

STEP 3: In a bowl, mix the red pepper, black beans, pineapple, chili powder, cumin, cilantro, ham, and and lime juice.


STEP 4: The chard should be pretty soft now. Add the cheese and milk to the pan until melted, then puree the whole shebang in a food processor.

(No, seriously, this is the dumbed-down version! I am telling you, my friend is nuts in the kitchen.)

STEP 5: Cut open a sweet potato, scoop in some salsa, and pour a little bit of the cheesy chard sauce on top.

STEP 6: Ignore husband who clearly has no taste buds.

STEP 7: Steal hubby's rejected cheesy chard sauce and mix it into your eggs the next morning. OM NOM NOM all over again.


Thanks for the recipe, Brianne!

Wednesday, April 25, 2012

RECIPE: S'mores Pops!

I'm feeling snackish today. Maybe it's because the last of the Easter candy finally ran out. I could literally eat a baker's dozen of these s'mores pops right now. (But I won't. Really. I won't.)

You may remember my recipe for portable s'mores from a little while ago, which was inspired by my love of campfire food and my fear of forest fires. These s'mores pops are inspired by both of the above, plus:

  • my annoyance with hauling my butt all the way to Joann Fabrics for melting chocolate every time I want to make something chocolate-covered;
  • several unsuccessful attempts at making cake pops. In fairness to myself, "unsuccessful" is a bit too harsh. I mean, no matter how fugly they were, they were still chocolate-dipped cupcakes. But they weren't adorable like cake pops are supposed to be;
  • a surplus of popsicle sticks;
  • an unexplainable competitive streak which made me determined to bring the cutest dessert of anyone at our most recent family gathering, nyah nyah nyah.


To get past the melting chocolate problem, I used my husband's oil trick from our recent chocolate-covered pretzel cookoff. See step 3.

You'll need:

  • a bag of marshmallows
  • a bag of chocolate chips (I used the Nestle minis)
  • about eight whole graham crackers
  • popsicle sticks
  • 2 tsp. vegetable oil
  • wax paper

STEP 1: Crush the graham crackers in a bowl.

STEP 2: Put a sheet of wax paper on a cutting board or plate.

STEP 3: Put the chocolate chips in a bowl and microwave on 50% power for 30 seconds. Stir, then microwave on 50% power for 15 seconds. Stir. Repeat in 15-second intervals until the chocolate starts to melt. Mix in 2 light teaspoons of vegetable oil and stir vigorously* until all the chocolate is still thick and goopy, but completely melted.

STEP 4: Hold a marshmallow by the edge and dip into the chocolate, followed by the crushed graham crackers. Lay the marshmallow "clean"-side down on a sheet of wax paper. Keep going until all the marshmallows are coated.

STEP 5: Put the marshmallows in the fridge for 15-20 minutes to set the chocolate.

STEP 6: Take the marshmallows back out and poke 'em with the popsicle sticks.

STEP 7: Do your cute little presentation thing, to really drive home to point of how awesome you are. I got these glass jars at Target for $5 and wrapped them with cheapo ribbon from Joann Fabrics -- clearly I can't escape that store even when I try.

Enjoy!

* Kind of a favorite word of mine right now.


This recipe was featured on...
my foodgawker gallery
Perfect timing...I'm adding this recipe to the S'mores Week Roundup at CookiesAndCups.com!

Tuesday, April 17, 2012

RECIPE: Baked Barbecue Tofu

Tofu is a weird food. The words "bean curd" freak me out, to be honest. I mean...is it curdled soy milk? I don't actually know the answer, and I've never Googled it because I don't want to know. Just in case I'm right.

The first time I tried tofu was at a Whole Foods near my old office. They had chipotle-lime tofu in the salad bar, and compared with the rest of the lunch options at Whole Paycheck, tofu had one distinct advantage -- the salad bar charges by the pounds, and tofu doesn't weigh much. I mean, a pound of tofu is the size of a brick. (Unlike tomatoes and watermelons, which are pretty much the biggest salad bar rip-offs ever.)

But then I tried to make tofu at home, and to say it didn't go well would be an understatement. I bought a lump of tofu, chopped it up, threw it into a pan with some seasoning, and after about 20 minutes I had a pan full of what looked like spicy curdled milk. So, I resigned myself to the fact that Whole Foods was working black magic on their tofu and I'd have to keep paying them $5.99 a pound to do so.

I waited four whole years before trying again. Luckily, in the interim, someone had tipped me off to the secret of slicing the tofu into 1/2"-thick slabs and pressing it between several layers of paper towels to absorb all the moisture. Once I had that little trick in my wheelhouse, it was a whole different story.

Until now, we've mainly been sautéing tofu in a teriyaki sauce. But then I came across a few recipes for oven-roasted tofu and figured I'd give it a try -- mainly because the cook time was only 25 minutes, and I was working on taxes all day and had forgotten to cook anything. I went with a barbecue theme because, well, those were the ingredients I had in stock.

Verdict: Delicious and so much easier than sautéing!


You'll need:
  • 1 lb. extra firm tofu
  • 1/4 cup ketchup
  • 1 Tbsp honey
  • 1 Tbsp lime juice
  • 1 Tbsp Worcestershire sauce
  • a few shakes of Frank's Red Hot

STEP 1: Mix everything but the tofu in a bowl and stir vigorously. Once you add the tofu, you're going to need to be gentle, so now is the time to get your aggression out with the whisk.

STEP 2: After drying out the tofu per the instructions above*, toss it (gently! did I mention gently?) in the bowl with the sauce.

STEP 3: Line a baking sheet with tin foil, non-shiny side up, and spread the tofu out in an even, single layer.

STEP 4: Bake at 400 degrees for 25 minutes or until edges start to look golden-brown.

That's it! I served it with a broccoli-cauliflower Steamfresh packet and Alexia sweet potato waffle fries. Yum! Perfect summer meal (since it's apparently already summer here in the Northeast).


* I slaved over a bright computer all night** writing this post for you! Read the paragraphs!
** Okay, I was primarily wasting time on Facebook. And yes, I just footnoted a footnote. That has to be some sort of new literary device -- can we name it after me?


This recipe was featured on....


Sunday, April 15, 2012

RECIPE: Slow Cooker Spicy Adobo Pulled Pork

So, if you're following along, you know that I've basically spent the past week torturing my family's palates with spicy foods (well, except for the less-adventurous toddler, who's been eating a lot of rigatoni and apple slices). This was the last installment of my self-proclaimed Spicy Food Week. It definitely has a kick, which you can mellow out by using less adobo sauce*.


You'll need:

  • 1-2 lbs. pork
  • 1 can chicken broth
  • 1 can of Goya chipotle peppers in adobo sauce
  • 1 Tbsp minced garlic
  • 1 Tbsp ground cumin

Throw everything into the slow cooker and stir it around a bit. I plucked the peppers out after stirring, because I hate the soggy texture of canned peppers -- but pluck them out after you stir, because otherwise you'll waste a lot of sauce. (The chicken broth sort of "rinses" the sauce off the pepper. That's the best way I can explain it.) Cook on low for 6-8 hours.

I served it with a sliced avocado and Goya rice with pigeon peas**, but it would be the perfect meat for burritos, quesadillas, enchiladas, fajitas, or taco night***.


*This tip has been brought to you by Chef Obvious.


** One of those boxed mixes. I don't know what pigeon peas are, and I certainly don't cook with them of my own accord.


*** Have I forgotten any delicious uses for tortillas?

Thursday, April 12, 2012

RECIPE: Spicy Buffalo Chicken Dip

I know, buffalo chicken dip recipes are a dime a dozen. But this one is particularly simple, spicy, semi-healthy, and super-delicious...if I do say so myself. And I do. I'll put my money where my mouth is on this dip. Or actually, I'll put this dip where my mouth is, repeatedly, until the bowl is empty.

I think I got a little lost in that metaphor. And I made myself hungry.

Anyway, check out this bowl o' yum!


You'll need:
  • (3) 5-oz. cans of shredded chicken*
  • 4 oz. Philadelphia cream cheese**
  • 1 cup sour cream
  • 1/2 cup Frank's Red Hot
  • 1/2 cup blue cheese crumbles
Mix it all in a bowl and microwave it for a minute or two, or put it in the oven at 350 degrees for 15-20 minutes. Let it set for a minute or two before you start dipping. I like red peppers for dipping.***

* Or 2 cups of the real thing, but the canned stuff is shredded so nicely and I just don't have the patience.
** Well, any cream cheese will do, but I have to represent my home turf.
*** Not true. I like nachos. But let's pretend.

Tuesday, April 10, 2012

RECIPE: Quick Chicken Curry with Spinach Chole

If you've ever made Indian food, you know it's a laborious, hours-long epicurean journey of chopping and rubbing and overnight-marinating and simmering and slow-cooking and hunting down approximately 1,937 ingredients you can't pronounce.

That's why I usually end up buying the Trader Joe's Indian packets. I mean, $2 and 90 seconds in the microwave, and you have tofu and veggies in a creamy curry. And it's delicious. For real, why would I try to compete with that?

Here's why: Because I bought some plain Chobani yogurt a few weeks ago, and my husband ate it before I had the chance to use it. So I bought some more, and he ate it again, and I was like, "Dude, I bought that for a recipe!"and he was like, "Oh really? Because it's been in the fridge for a few fortnights*" so I vowed to use yogurt in a recipe ASAP to prove I had a plan all along.

So I decided to come up with a chicken curry recipe that's actually semi-easy. Is it as good as real chicken tikka masala? No. But it also doesn't take longer to prepare than an actual plane ride to India, so at least I win on that front.


What you'll need...

FOR THE MARINADE:
  • 1-2 lbs. chicken
  • 6 oz. Chobani plain yogurt
  • 1 Tbsp lemon juice
  • 2 Tbsp garlic
  • 2 tsp ground cumin
  • 1 tsp cayenne pepper
  • 1 tsp black pepper
  • 1/2 tsp ground ginger
  • 1 tsp Papa Joe's salt (a mix of sea salt, pepper, and garlic power)


FOR THE SAUCE:
  • 2 tsp ground cumin (yeah, more cumin)
  • 2 tsp paprika
  • 1 tsp Papa Joe's salt (yeah, more salt)
  • 8 oz. tomato sauce
  • 3/4 cup milk
  • 1/2 tsp ground cilantro
  • 1 tsp Coffeemate Simply Sweet Cream


Combine the marinade stuff in a large ziploc bag or bowl and let it sit in the fridge for an hour or two or three. When you're ready to eat, saute the chicken and marinade in one pan until it's cooked through, and simmer the sauce in another pot for 20 minutes. Mix them together.

For the spinach chole, I just bought a box of chole and added in 1/2 cup of spinach. I can't handle the time commitment of soaking beans, and I'll never out-chole a packaged chole anyway.

બોન àª–ોરાક
If that's not Gujarati for bon appetit, you can blame Google.


* I'm paraphrasing. He would never say "fortnight."

Monday, April 9, 2012

Bacon-Wrapped Jalapeno Recipe (a.k.a. Alligator Bites)

My brother-in-law Mike and I are basically polar opposites, but we share one very important belief:

BACON MAKES EVERYTHING BETTER.

I mean, when you see the words "bacon-wrapped" in a recipe, you know it's a guaranteed win, right?

Anyway. Mike served these at a party last month, and I stole the recipe and have pretty much found every possible excuse to make them. The recipe is short and simple, but it also presents several opportunities to burn yourself, so don't skim over the disclaimers in your rush to consume bacon.


You'll need:
  • one pack of bacon (I like the new Oscar Meyer Selects nitrate- and nitrite-free kind!)
  • a bunch of fresh jalapenos (Short and fat work best. I think I used eight in the above photo.)
  • 4 oz. cream cheese (I like Philadelphia cream cheese!)
  • 1 Tbsp. Old Bay seasoning

STEP 1: Slice the stems off the jalapenos, cut them lengthwise, and scoop out the seeds and meaty stuff. 

STEP 2: In a bowl, mix the cream cheese and Old Bay. Scoop the cheese mix into the hollowed-out jalapenos. 

STEP 3: Wrap each jalapeno with a slice of uncooked bacon and secure it with a toothpick.

STEP 4: Place a metal grate (I used the one from the toaster oven) over a baking pan or a casserole dish. Lay the wrapped jalapenos on the grate, and cook at 400 degrees until the bacon browns to your liking. You can also grill them -- that's how Mike made them, but I'm too lazy and pyrophobic to cook outside.


DISCLAIMERS!!!!
  • When you're chopping fresh jalapenos, you might want to wear gloves, especially if you're using an extra-spicy variety. Don't touch your eyes. Be careful if you have asthma. The best idea is to trick someone else into doing this part of the job. It sucks! 
  • If you ignore the above disclaimer and end up with jalapeno burn-juice on your hands, wash with dishwashing soap, then soak your hands in lemon juice for a few seconds (make sure you get the lemon juice under your nails, too!), then once more with the dish soap. Lick your finger as a test before touching your eyes.
  • DO NOT use a cookie sheet under the grate! The bacon fat will drip down through the grate, so use a fairly deep dish or baking pan (like a brownie pan) to keep the fat from burning your hands or turning your oven into a box of fire.
  • Control yourself when it comes out of the oven. The cheese is hot lava for the first minute or two.
As long as you follow these guidelines, you'll enjoy injury-free deliciousness.

P.S. If you like gardening, jalapenos are ridiculously easy to grow! 

Sunday, April 1, 2012

How to Rescue Almost-Ruined Chocolate Covered Pretzels

Originally, this post was going to be called "How to Make Chocolate Covered Pretzels" for the benefit of anyone who, like me, doesn't have the crafty gene and needs to be handheld through the process the first time. (And yes, I'm calling it a craft. You can't buy sugar and flour at Joann Fabrics, but you can buy melting chocolates! Hence it's a craft.)

I was making chocolate covered pretzels for a friend's Easter Egg Hunt. Things started out okay. I put the chocolate in the microwave for a minute on 50% power.


I kept popping it back in for 20-second intervals at 50% power until it got nice and melted.


Or so I thought. While I was microwaving, I was also telling some long-winded story to my husband and I apparently overshot the melting process a little, because when I tried to dip my pretzels, they turned into delicious-but-fugly chocolate globs.


Now, here's where my hubby and I went in different directions. I wanted to take the easy way out; he is an engineer. So we present you with two options for rescuing chocolate covered pretzels when you get distracted and accidentally overcook the chocolate a little bit.

OPTION A: JUST GO WITH IT

Crush the pretzels and dump them in the bowl of goopy chocolate until you have a pleasing pretzel-to-chocolate ratio.


Scoop one-inch balls of pretzel mush out of the bowl and let it set on wax paper. Done! Wasn't that easy?


But my husband doesn't do easy. So he decided to go with....


OPTION B: THE CHEMISTRY EXPERIMENT

Add vegetable oil to your chocolate, 1/2 teaspoon at a time, until it hits a consistency that seems conducive to dipping and evenly coating pretzels. For my husband, this ended up being around 2 teaspoons. Then dip and set as usual.

[EDIT: Okay, hubby wants me to alert you to two things. First, the interweb warns that you should never add more than a tablespoon! And second, even with only two teaspoons, it took a lot of stirring to get it to cooperate. This is why I stand by my pretzel clusters!)


He would want me to point out how much nicer his look than mine. But I would like to point out that I sabotaged him by making him test out his scientific theory using peppermint chips, and everyone was a little scared of the mint pretzels. Even though they were delicious, much like Snyder's York Peppermint Pretzel Dips, which are the best thing since sliced bread and I don't know why they're not in stock anywhere! But I digress.

Anyway, both methods work very well in their own way, so don't abandon ship if your melting chocolate isn't cooperating! And I'm happy to report that all the pretzels played very nicely together on a party tray.


The End.

Thursday, March 22, 2012

EASY-PEASY RECIPE: Honey-Soy Chicken

Secret recipes are a big pet peeve of mine. I hate when someone tells you a recipe, and you try to recreate it, and it so obvious that they've conveniently "forgotten" a key ingredient. It's like they're thinking, "If they know how to make my oatmeal cookies, what reason will they have to invite me to parties?!"

I have no secrets in the kitchen. Which is why I was a little peeved when I pulled this recipe from my Pinterest board today and noticed something was....a little off. Looks delicious, right? But what are the red things? The recipe doesn't call for anything red. What are you trying to do to me?!

As it turns out, I didn't have enough soy sauce so I had to tweak it a bit anyway.

Secret recipe for the veggies: Bag of Steamfresh Asian Medley.

You'll need:

  • 1 lb. of boneless chicken strips
  • 2 Tbsp. soy sauce
  • 1 Tbsp. oyster sauce
  • 1/2 Tbsp. olive oil
  • 1 Tbsp. minced garlic
  • 1 Tbsp. honey
  • three shakes of cilantro flakes

Stir everything but the chicken in a bowl, then mix in the chicken. Funny story, I went to throw the chicken wrapper away and when I came back, I couldn't find my fork anywhere. It was gone. Gone! My husband always complains because I use, like, 42 pieces of silverware to make a single meal, but it's because I'm always misplacing the stuff I'm working with. As you can see from this photo, the fork was nowhere to be found.


Yeah. So anyway, stir it all around, let it hang out in the marinade for a few minutes, and then cook over low heat in a skillet.


I know, that picture really isn't helpful in any way. I'm pretty sure you already know how to put chicken in a skillet. I wasn't worried that you might stack all the chicken into a giant chicken-tower in the middle, or anything like that. It's just that once I get into picture-taking mode, I can't be stopped.

You'll notice there's no cilantro in the skillet. That's because I forgot it. So, it's up to you whether you add it to the marinade, or add it to the skillet. That's not a secret -- that's just good old-fashioned forgetfulness. (Wait, where did I put my fork?)

P.S. Bringing this dish to the linky party at Countertop Confections. What's a linky party? Beats me. But darned if I'm not going to show up!

Saturday, March 17, 2012

EASY-PEASY RECIPE: Tagine-Style Chickpeas with Couscous

Lately I've been recycling a few of my favorite recipes, which is a nice, euphemistic way of saying I've been stuck in a recipe rut. So when my husband forwarded me a tagine recipe from his boss, I was like, "Awesome!"

Okay, not really. I was like, "What the hell is a tagine? It calls for dates...what are dates?" Dates are one of those things I'd heard of but never knew exactly what they were. But armed with information from a few helpful readers, I set off on an epic quest to find dates.

Except it was 75 degrees that day, so when I failed to find them at the closest grocery store, I abandoned my quest (a.k.a. a trip to Whole Foods) and went to the park with the boys instead. So I decided to use raisins* as a substitute for now. (I think figs would make a bangin' substitute, too.)


I modified the original recipe to an unrecognizable degree because it was way complicated -- a lot of steps, a lot of stove-vigilance, a lot of unfamiliar ingredients. So this is my super-simple version.

You'll need:
  • one box of plain couscous
  • 15 oz. can crushed tomatoes
  • 2 cans of chickpeas
  • 1 cup raisins, dates, figs, or dried apricots
  • 1 tsp. ground cilantro
  • 1 tsp. cumin
  • 1 tsp. coriander
  • 1 tsp. ground ginger
  • 1 tsp. minced garlic
  • 1/2 tsp. cinnamon
  • salt and pepper
  • olive oil
  • 1/8 cup water

Saute everything but the tomatoes and water in a little bit of olive oil, until the chickpeas start to look a little more cooked. Then add the tomatoes and water, and simmer for 5-10 minutes.

In a separate pot, cook the couscous according to the package instructions. I use instant couscous because it takes 10 minutes max, and I sprinkled a little salt and pepper in the water while it was setting.

Scoop it on and enjoy!


* Even though I hate raisins. Seriously, can someone explain their appeal? It takes nine years to chew them and even longer to wash the sticky residue off your hands. They're like a natural alternative to industrial-strength wood glue. Still, I took one for the team.

Sunday, January 8, 2012

Smores Fun, Part 2: Portable Smores

I love smores. Campfires? Not so much. I have a wicked case of pyrophobia. Just lighting a candle at home requires serious strategy and vigilance -- Will I be home the rest of the day? There's no chance of me leaving the candle unattended, as the label explicitly warns against? OMG, did an ember just fly off when I blew it out? I'd better go look for it.... So a forest fire is my personal equivalent of a 25-foot python or a hairy spider the size of your fist. Which makes camping difficult, because I have to stay up all night making sure our fun smores-fest isn't going to burn down the Pine Barrens.

I guess my point is, these smores are much easier. And less messy. And they last for days and travel well in a Ziploc bag. All good things!


You'll need:

  • jumbo marshmallows
  • melting chocolates (I got them at Michael's)
  • graham crackers
  • wax paper (preferably...but a cookie sheet would work)

STEP 1: Crush one sleeve of graham crackers. I put them in a plastic baggie and used the flat side of a meat tenderizer. Ideally, stop when they look like tiny graham cracker crumbles, but before they turn into powder (but powder's okay, too). Pour the crushed grahams into a small bowl.

STEP 2: Melt the chocolate using the instructions on the bag. Don't overcook it or it'll turn into a weird crystallized lump of crap -- I speak from experience.

STEP 3: Hold a jumbo marshmallow by the rim and dip the top part in the chocolate, then roll it in the graham crumbs. Place the un-chocolate-ified side on the wax paper and let dry. Repeat until you run out of chocolate or graham crackers. Test them often along the way. You're not checking for anything in particular -- you're just, you know, being a responsible cook.


These were a HUGE hit at Christmas. Because really. They're fantastic.

Friday, January 6, 2012

Smores Fun, Part 1: Smores Pseudo-Martini

The other night, my hubby was like, "Make me a nightcap!" Then he went back to chewing on his pipe and reading through his monocle. Or maybe not. His actual request was, "You should make me a fancy drink and then blog about it" -- always keeping the idea mill running :)

So here's what I came up with, despite that fact that my bartending experience is limited. (This is an understatement. I only have a 70% success rate working a bottle opener, let alone preparing actual drinks.) I was going to call this a "smores martini," but I think a martini has to have vermouth...? Whatever. It's a delicious smores-inspired beverage served in a martini glass.

You'll need:

  • 1 oz. tasty vodka (chocolate, vanilla, marshmallow)
  • 1 oz. Baileys Irish Cream
  • chocolate syrup
  • 1 oz. half and half
  • 1 oz. milk
  • graham crackers and marshmallows (for garnish) (I just like saying "for garnish")


Obliterate the graham crackers. Rim the glass with the cracker crumbs. You can use milk or icing to make it stick.


Squeeze some chocolate syrup into the bottom of the glass.


Mix the beverage-y stuff in a shaker (or in your gym water bottle, whatevs) and pour into a martini glass. Dress it up nice with some marshmallows on a skewer et voila*, you have a smores martini that's not really a martini.


Cheers!

* No idea if I used that correctly.

Tuesday, December 6, 2011

RECIPE: Baked Broccoli. It's nothing short of magical.

I saw a recipe for oven-baked broccoli, and my first thought was, "Wow. That sounds like a way to make raw broccoli even more dry and bland." But then I kept seeing more and more recipes for it, so I finally decided there must be some truth to it. (Not that trendy foods can't be gross -- I'm talking to you, alfafa sprouts/foie gras/wheatgrass shakes.)

So this weekend, we tried it. And it...was....AMAZING! Okay, that's a strong word. Usually, the biggest compliment I can muster up for a vegetable recipe is "edible" or "tolerable." But these were straight-up delicious.


You'll need:

  • raw broccoli
  • 1-2 Tbsp. olive oil
  • salt, pepper, and garlic to taste*
  • lemon juice (or a lemon if you're feelin' fancy)
  • parmesan

Chop the broccoli into bite-size florets. Toss them with a little bit of olive oil, salt, pepper, and garlic. Lay them on a lightly greased cookie sheet and bake at 425 degrees until the tips of the "trees" start turning golden-brown. For us, that was 10 minutes, but our oven cooks with the power of 1,000 suns. Then take it out, squeeze some lemon juice over it, and sprinkle with parmesan cheese.

How delicious is it? Um, my hubby walked out of the room and I snuck a few florets while he wasn't looking. Yeah -- I STOLE BROCCOLI. Usually (much like a 3-year-old), I save my veggies for last, eat five bites, announce that I'm full, and scrape the leftovers onto his plate. So for me to sneak broccoli because I didn't want to share -- that's huge. I want to make this every night. And maybe for breakfast too.

Sorry, buffalo chicken -- you're only the second-tastiest thing on my plate tonight.

* Just shake it until it looks about right. As usual, I subbed Papa Joe's salt for all three.

Thursday, December 1, 2011

EASY PEASY PIE: Swedish Apple Pie Recipe

Yikes, I haven't posted in a week -- my mashed potato coma was followed by Black Friday madness, Cyber Monday impulse shopping, and then a day or two of sheer laziness. But, I'm back. And I have a pie recipe as a sort of peace offering for being a bad, bad blogger.

We went to my in-laws' house for Thanksgiving, and they asked if I'd bring a cherry pie. I don't know how to make one of those, so I offered to make an apple pie instead. But if you want to get technical, I don't know how to make that either, so I decided to make a Swedish apple pie.

I don't think it's actually Swedish, but that's not important.

It's super-easy, and that is important.


You'll need:

  • 5-6 medium-sized apples (I like Rome apples)
  • 1 cup sugar
  • 1/4 cup sugar
  • 2 Tbsp. cinnamon
  • 1 1/2 sticks butter (melted)
  • 1 cup flour
  • 1 egg

Preheat the oven to 350 degrees.  Lightly grease the bottom of a pie plate.  Chop the apples into thin slices and fill the pie dish until it's about level with the top. (Nope, there's no crust on the bottom. Have faith!)
Mix 1/4 cup sugar and 2 Tbsp. of cinnamon in a bowl, then pour evenly over the apples. Then mix the egg, 1 cup sugar, 1 cup flour, and the melted butter in a bowl and pour the mixture evenly over the apples. Some will fill in the cracks, the rest will sit on top. Bake for 45 minutes or until the top turns light golden and a little bit crispy to the touch.

Everyone polished it off and my brother-in-law nominated it as my new signature dish. Woohoo! Win.

Plus it's apples. So don't feel like you have to wait until the holidays. It's practically health food!

Sunday, November 20, 2011

RECIPE: Slutty Brownies = the perfect storm of desserts!

I want to tell you about the best brownies in the whole wide world.

Brownies + Oreos + chocolate chip cookies = wheeeeee sugar WHEEEEEEEEEE!!!!

I think I have vertigo.


Disclaimer: This isn't my recipe. In fact, let me start by explaining how I create the recipes I post on here. I have no cooking skills, so I can't just "throw a few things together" in the kitchen because the outcome will usually be surprising in a really bad way. So instead, I start by Googling whatever I feel like eating ("mexican pork slow cooker") and then skim a bunch of recipes to find ingredients I recognize ("corn!"). There's usually a bit of follow-up Googling ("substitute for dill?" or "can you mix basil and cilantro?") and eventually, I come up with a list of ingredients that will, most likely, taste okay when put together. My husband gets the lucky job of lab-testing the meals ("Welcome home, honey, I put jelly in the meatloaf!") and then the ones that don't suck (in my final and overriding opinion) wind up on here.

When three or four days go by without a recipe, you should really feel bad for my husband. Send him a lasagna or something.

But when I stumbled across this recipe, I knew it was solid gold. I ran out to the store at 10:00 at night to get the ingredients. I didn't need to tweak, substitute, or simplify anything. So, I can't lay any claim to this recipe -- all I can do is bow down to The Londoner for sharing her stroke of culinary genius with the interwebs. I think she's my new girl crush, but that could just be the sugar high talking.

She calls them Slutty Brownies -- if that term makes you cringe, try to look past it, because these brownies will make you lose your moral compass.

Click here for the full recipe from The Londoner.

Short version: Line the bottom of a greased 9x13 baking pan with cookie dough batter (I used Betty Crocker bagged mix and added an extra Tbsp of water and an extra Tbsp of applesauce to the batter, like the recipe suggests). Then a layer of Oreos. Then pour brownie batter over that, and cook at 350 degrees for 30 minutes. It comes out looking like this:


Unbutton your pants because you're going to want to eat, like, five.

Sunday, November 13, 2011

RECIPE: $3 "Sweetloaf" Meatloaf Recipe

Okay, who has $3 to spare and wants to settle a bet between me and my husband?

I thought this meatloaf was crazy delicious, and the fact that it took me less that five minutes to prep made it a big fat win. My husband's verdict was that it's "not Italian." Oh, I'm sorry, he just read the post and told me to change it to "not good." Anyway, I know I can't out-meatloaf my mother-in-law, but I still think this is a fantastic dinner. And fast. And did I mention cheap? And delicious?

Now, full disclosure, the ingredient list is going to require a leap of faith.

You'll need:
  • 1/8 cup yellow or brown mustard
  • 1/8 cup grape jelly
  • 1/2 cup seasoned breadcrumbs
  • 1 lb. ground turkey


It's an inexact science -- I just filled a 1/4-cup measuring cup with half mustard, half jelly. Then all you have to do is mash everything together, squish it into a loaf shape, rub some olive oil on the bottom of a casserole dish, and plop it in there. Cover it and cook at 350 degrees for 45 minutes. 


And then report back and tell me who's right :)

Monday, November 7, 2011

SEMI-EASY RECIPE: Bootleg Olive Garden San Remo Seafood Dip

Hubby and I used to eat at Olive Garden a few times a month, and I can sum up the reason in four words: San Remo Seafood Dip. Anyone remember that dip? It was the stuff that dreams were made of. It was my desert-island food. It was crabby, garlicky deliciousness. We didn't even need a menu when we went in -- we ordered the same thing every time.

And then one night, we ordered it, and the waiter came to our table with...spinach artichoke dip. Whoa whoa whoa, WTF!??! Don't get me wrong, I love spinach artichoke dip -- but I can make spinach artichoke dip at home. I couldn't recreate San Remo dip. I had tried. It cost me $18 in supplies and tasted like the airplane-food version of the dip.

"Excuse me," I said. "We ordered the San Remo dip."

"Oh," said the waiter. "That's not on the menu anymore."

I'm not sure why he thought spinach-artichoke dip was an adequate substitute for The Best Food in the Whole Wide World -- and such an adequate substitute that he didn't even need to notify me -- but whatever. I couldn't worry about his crappy waiting (waitering?) skills, because I was too busy wrapping my head around the fact that I'd never eat San Remo dip again

That was 10 years ago. I'm still not over it. So the other day, I went on a search for a copycat recipe. And unlike the crap-stew version I found last time, this recipe actually looked like it might do the trick. I tweaked it a little but....IT WORKED!!! And the stars and planets realigned, and now I can drive past Olive Garden without the usual cursing and fist-shaking. 


Oh San Remo, I have missed you so!


YOU'LL NEED:
  • 1 can shrimp
  • 1 can white crab
  • 2 oz cream cheese, cubed
  • 2 Tbsp. olive oil
  • 2 Tbsp. flour
  • 1/2 tsp. Papa Joe's salt
  • 1 tsp. minced garlic
  • 1 tsp. horseradish
  • 1/3 cup + 1/4 cup grated romano, asiago, or parmesan
  • 1/4 cup half and half
  • 1 cup marinara


Heat olive oil and flour in 2-qt. saucepan. Add the liquids from the canned seafood, the cream cheese, salt, garlic, and horseradish. Stir until smooth. If it looks like hot vomit, that means you're doing it right!


Add romano and seafood. Stir until heated. Add half and half. Simmer 10-15 minutes. The texture will start to improve, and it will actually begin to look and smell like something you might willingly put in your mouth.


Rub olive oil on a casserole dish. Pour the marinara in the bottom. Pour the mixture on top, and top with 1/4 cup of romano. By now, it will look yummy and smell like MAGIC!


Bake at 325 degrees for 10 minutes. I was so excited that I sat in front of the oven and watched it cook, but that's not a necessary step unless you, too, have been suffering withdrawal since 2002-ish. Let cool for a few minutes before serving. Yum.

So, have you ever had a favorite dish taken off the menu? While we're on the subject, I'm also a little sore with Applebees for 86ing their french dip sandwich. And if Dunkin Donuts ever takes away the butternut donut, there will be mutiny.

Saturday, November 5, 2011

EASY RECIPE: Elvis PB-Chocolate-Banana Bread

I don't have a thing for Elvis or anything. I just impulse-bought some almond flour at Trader Joe's, and needed a reason to use it. For some reason, the second I set foot inside a Trader Joe's, I lose my ability to evaluate my needs. I'm like, "What's tapenade? Looks like something I need. What do you use polenta for? Whatever, it's $2.99." Full disclosure, I just had to go to the kitchen and double-check the tube of polenta to make sure that's what it was called. But I bought it, and now we have it.

Anyway, I based this on a recipe for peanut butter blondies. I substituted some ingredients, threw it in a pan, and figured I'd see what came out. The verdict: Bread! It's the consistency of a banana bread or pumpkin bread.

It's also the perfect thing to make when you find yourself stuck with a banana that looks like this.


Mmmm....appetizing.

You'll need:
1/4 cup applesauce
1/4 cup brown sugar
one mashed overripe banana
1 egg
1 tsp. vanilla extract
1/2 cup flour
1/2 cup almond flour
1 tsp. baking powder
1/2 tsp. baking soda
1/4 cup almond butter
1/4 cup chocolate chips (I used the Nestle minis)

Combine everything in one bowl using a hand mixer.


Grease an 8x8 pan. (For greasing, I like to use a sandwich bag as a glove and grease with Country Crock.)


Pour the batter into the pan and cook at 350 degrees for 25 minutes. Let them cool in the pan, then slice and serve.


When I told my husband what I made, he said, "Why'd you do that?" Um, because it's delicious? But after I forced him to eat one, he ate two more and then demanded that I take the rest to our neighbors before he polished off the pan. They're that good.

P.S. You can sub regular flour for the almond flour and regular peanut butter for the almond butter. Again, I'm usually working with whatever random stuff I was tricked into buying by Trader Joe's black magic. Also, my husband suggests substituting peanut butter chips for the chocolate, or just leaving it chipless.

Wednesday, November 2, 2011

EASY PEASY RECIPE: Chicken with Cucumber Salsa

I'm still recovering from the epic moussaka adventure, so as a sort of kitchen detox, I'm following up with the easiest recipe ever. Seriously. THIS IS SO EASY. And it's a great way to use up random leftover veggies.


Yum, right?

The cucumber salsa recipe comes from my friend Erika, the blogger behind Honey I Shrunk My Butt.

The chicken recipe is my own creation. If you can call it that. I mean, my two-year-old could probably come up with this if I left him alone in the kitchen for five minutes. (Okay, that's not true. If I left him alone in the kitchen for five minutes, he'd most likely eat a whole box of Triscuits and dump out every piece of paper in the recycling bin.)

You'll need:

  • boneless chicken
  • a cup of salsa (any kind)
  • half a cucumber
  • half a red pepper
  • 1/4 of a red onion
  • some corn
  • 1/2 Tbsp. cilantro
  • 1/2 Tbsp. Mrs. Dash Southwest Chipotle seasoning blend


THE CHICKEN
Put a pound of chicken in a crock pot with half a jar of salsa. (I used Newman's Own pineapple salsa, but any salsa is fine. I'm thinking salsa verde would be phenomenal.) Cook on high for 2-3 hours. That's it.

THE SALSA:
Dice the cucumber. Dice the red pepper. Dice the onion. (Shout-out to the Pampered Chef Food Chopper, by the way. It seriously might be my favorite kitchen tool. And my kids think it's a toy, so I can actually persuade them to help me cook!) I used about half a bag of Steamfresh corn. Mix it all together in a bowl with the cilantro and seasoning blend.


When the chicken's done, put it on a plate and dump the salsa on top, or wrap everything up in a flour tortilla. That's it. Super-healthy, beyond easy, and the cucumber is a refreshing twist on pico de gallo. This is totally getting added to regular rotation at our house.